"How do you repair sidewall damage if it's not on a flat part of the tire?"
This is one of our most commonly asked questions. Of course you can patch a flat sidewall surface, but what if the damage is over the lettering or even part of the tire lug?
GlueTread customer, Steve, asked this question after puncturing his sidewall with a 1 inch branch on the tire lug. Steve had heard about GlueTread from the Snail Trail podcast earlier in 2022 and wanted to save his tire.
After some correspondence with GlueTread, Steve began to cut down the tire lug with his pocket knife. Using a combination of his pocket knife, a grinder and the sand paper included in each GlueTread kit, Steve was able to sand down the damaged area to a flat surface.


Obviously not everyone carries a grinder while they're on the trail. According to Steve, "the knife worked great and the sandpaper would work if you were patient." In other words, the grinder certainly makes things easier, but you can create a flat surface to patch your tire with just a knife and some sand paper.
The next step in Steve's repair process was to use the GlueTread adhesive to glue the damaged area back together and sand the area again. This helps remove any excess adhesive.

Next, Steve traced a patch over the damaged are. It's important to have at least 1/4 of an inch around the damaged area that is covered with a patch. Then, Steve applied small dots of glue over the tire and applied the patch. By using the GlueTread accelerator spray, the adhesive cures immediately.

Steve used the patched tire on his next weekend out riding. He rode over 12 miles during the day without losing any air.
Steve started the day at 10 PSI. Because he was riding through snow, he soon aired down his tires to 6 PSI. The patch was able to flex with the lower PSI and at the end of his day, the tire was still at 6 PSI.
When the damage initially occurred, Steve had a spare and took home the damaged tire to repair later. However, with GlueTread, you can repair your sidewall damage on the trail without removing the tire from the vehicle.
Even if the damage is on an uneven part of tire, with a pocket knife and the provided sand paper, you'll be able to create a flat surface to repair your tire.
That being said, a small battery grinder is handy to have in your repair kit. Here are some tips if you're using one on the trail or back at home:
- A grinder can super heat rubber. For the best results, cut down as much of the raised rubber or lug as possible. Sand very briefly with the grinder. If you use a grinder too much, it is easy to super heat the rubber and then GlueTread patches won't work.
- If you have another old tire on hand, you can always practice sanding on the older tire first.
Lastly, anytime you're repairing your tire, these two things are key:
- More adhesive is not better. Use small dots of adhesive on the damaged area. Check out this video, of our full patch application process on the Rubicon Trail.
- Take the time to prep! Make sure you sand down the tire as close to flat as possible.
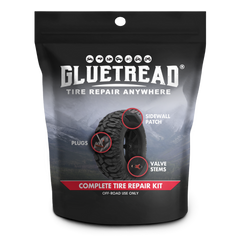
To purchase the kit that Steve used in this repair, click here.
If you have any questions about the GlueTread sidewall repair process, use our Contact Us page or give us a call! (800) 238-9791


Leave a comment