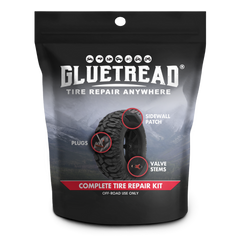
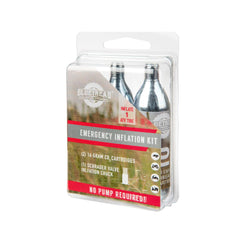
Let's face it, when it comes to patching up the sidewall of a tire, it's not a matter of "if," but "when." So, if you've recently bought a GlueTread kit or are thinking about it, buckle up because we're about to embark on the ultimate tire-saving guide.
Remember, tire troubles usually strike when you're off the grid, so having these tricks up your sleeve is as handy as a spare tire on the trails.
Step 1: Prep Your Surface
If you’ve been out riding all day, your tire is likely caked with dust or mud. Take whatever fabric you have handy - your trusty T-shirt, the rag we've thoughtfully included in the GlueTread Deluxe Kit - and give that tire a good wipe-down.
Now onto sanding. Every GlueTread kit contains enough sandpaper to make the damaged area a smooth surface. If your sidewall damage is over raised lettering, we suggest placing a patch behind the sandpaper for extra stability and then sanding the surface until it’s smooth. Some riders carry grinders in their vehicles, which can really come in handy. Be gentle. Don’t smoke the rubber when removing. You will reduce the bond strength.
Once the surface is smooth, get ready for step 2.

Step 2: Apply Adhesive to the damaged area
Take out your GlueTread adhesive and chop off the tip with the pocket knife that is somehow always in your pocket. Then, add an applicator tip to the top of the adhesive.
Try not to go overboard here, but add a small amount of adhesive to the slice in your sidewall. It’s helpful to use that same pocket knife to lift up one side of the slit to place adhesive right on the part of the tire that split.
After you’ve put the adhesive on, hold the damaged area back together.
Let the adhesive cure for a full minute before sanding off the excess. Sanding again is really important here!
Step 3: Measure Patch & Trace on Tire
Find the right side patch for your damaged area. There should be at least ½ inch all the way around the damaged area - more edge is better.
You might have to cut your patch or trim it a bit using that same good ole’ jack knife.
Our Deluxe kit contains a sharpie you can use to trace a patch, but you can even use a stick to make a mark on the tire where your patch is, literally anything works. You're resourceful, you'll figure it out.

Step 4: Apply Adhesive
Okay, this is the tricky part so we literally put a card in every Gluetread kit with extra adhesive instructions.
Using the adhesive + applicator tip, apply the adhesive to the tire. Use small dots that are like the card included in your GlueTread kit or the image below.
What not to do:
- Don’t put adhesive on the patch
- Don’t put adhesive on in a way that makes it drip down the tire
- Don’t Use chemicals to wipe the surface like alcohol, wd40 or Miller Light
- And please, don’t use an entire bottle of adhesive
Then, immediately and carefully, put the patch in place. Apply pressure evenly for 1 minute.
Note: Ensure corners are firmly attached. If there’s a corner that can be pulled up a bit, just drop a bit of adhesive in the corner and push down for another minute.

Step 5: Wait & Inflate
We've recently updated all of our GlueTread kits with an improved rubber formula that allows the adhesive to fully cure in 5-10 minutes. Some of our kits include a GlueTread accelerator spray that immediately cures the bond. However, now you don't need the spray! Simply wait a few minutes and inflate in your tire.
More on How to Repair the Sidewall of a Tire
We highly suggest watching this quick 1 minute tutorial on repairing a sidewall. For all those gear nerds, there’s a longer, more fun version that you can watch here too.
As always, your safety is our top priority! So if you still have questions, visit our FAQs page or send us an email to info@gluetread.com. You can also message us on Instagram or Facebook and our co-founder + VIP Inventor, Dave will answer your questions himself.
Happy Riding!


Leave a comment