

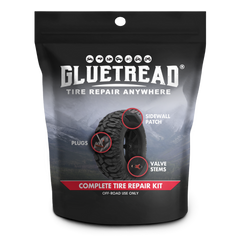

So Andy here with GlueTread. We’ve been getting a lot of questions on whether our sidewall repair kits work for Jeep tires. So what we’re going to do is we’re actually going to do one right here. Obviously all of our patches are for off-road use only. I realize we’re on pavement, we’re going to be replacing this tire before we drive anywhere. I’m going to go ahead and put a hole in the sidewall and then we’re going to patch it right in front of you. As you can see, this tire is now flat and what we’re going to do is take this sidewall repair kit. This is the best kit for this kind of tire. It’s a little bigger than our external patch kit and what we’re going to do is what’s included in the kit here is your patch, sandpaper, these instructions that are going to go over everything I’m about to do and then obviously the adhesive and the applicator tips.

The first thing that you’re going to want to do is make sure that your area is clean. Obviously, this tire is already clean. I’m going to go ahead and cut the tip off of this adhesive and then put this applicator tip on. The first step to this whole thing is actually putting adhesive right onto the damaged portion of the tire. I’ll actually pull that out a little bit so I can get a good view at it and just drop adhesive right here onto the damaged area. So once that's back, I’m going to push it together and hold it to try and get that even right there. You hold that for about 10 seconds or so and let it get the initial cure and you’re good. From here, what I’m going to do is use the sandpaper that’s included in the kits and i'm going to sand all around this so we have a smooth surface all around this area. Once you’ve got that sanded down pretty well, we actually include four pieces of sandpaper use as much you want. Once you get that sanded down pretty well, what you’ll do is kind of take your patch and figure out where you want it. Now you want at least a quarter inch around the damage everywhere. If you can get more, like a half inch, that’s better. You can see i’ll go you know somewhere like this and kind of make a line here that i’ll be cutting.

You can actually cut this with a pocket knife or whatever you might have. I have a pair of scissors here that i’ll be using today. It might take one or two cuts but you can see that works just fine. Once you get it here, what you’ll actually want to do is take a marker or something like that and mark the edges. You’ll want to put this up and mark the edges here on where your patch is going to go so that you know where to put your adhesive. There’s two ways to do this depending on how big your patch is. If you’re using a full patch, we have another process for that and I'll put a link for that video. For this one, it’s kind of a smaller patch, i’ll just probably put it right on. It doesn’t need to be quite that long there. Something kind of like that, maybe one more trim here. So there you have it, like I said you can use a marker if you have it, I'm just marking with my nail here but now what i’m going to do is put drops of adhesive. It’s important that you use drops and not just a full layer. I’m just going to put the drops of adhesive here around the corners that I had marked and I’ll do this the whole way around the area where the patch will be applied. We have information in the instructions that’ll tell you about how much per square inch and all that but you want to look pretty much something like that. From there, I’m going to go and take the patch and just apply it right here and I'll go ahead and hold that for 30 seconds. Now the initial cure time for this adhesive is 30 seconds. Before you put air in it, we recommend that you wait an hour. There is a different option for this and that is this accelerator. It’s also available on our website. I’ll be using that shortly and that actually makes the adhesive cure immediately. I’ve kind of got an initial cure here so you can see that’s staying. One thing I’ll do before I use any of the accelerators is I make sure that our edges are down so I might come in and put a few more drops here just to make sure that all of the edges are going to hold tight. Like I said, that’ll normally take an hour to cure but since we’re gonna do this all in one shot we’re gonna go ahead and use our accelerator and this will actually cure like literally immediately. You want to spray the edges of the patch the whole way around just like that and then let it sit for about 20 seconds. We have a compressor here that’s already loaded up so we’re going to go ahead and start adding air back to the tire. As you can see by looking at the bottom of the tire, it is holding air. We’ll see if this compressor has enough air in it to get us up. If not, we’ll blow it up off camera. It sounds like we’re running out of compressor, so we’re going to blow the rest of it off camera and we’ll come back and show you how it looks.

You might be able to hear that we’re actually losing some air right here. If this is the case where maybe I didn’t put enough adhesive on that edge, what we’re going to do is drop some adhesive in where you can hear the air is coming, and then I’ll hold it down like that. You want to make sure you get the adhesive all the way through there and then hold it down for a second and then give it a spray. So we filled the rest of the tire up off camera. As you can see it’s holding the air. We are at 21.2 psi now and it's holding just fine. We appreciate you taking the time to watch the video and we’ll be coming out with more stuff soon! Thanks.
Leave a comment